Author Archives: Matt

Matt

About Matt

The husband. The slow one; the reluctant one. The "let's think about it some more" one. The one who figures out how things are done.

The Trailer is Gone!

Sorry, we’ve been quite busy over the past couple of weeks with stuff, both house-building and work-related, but I though I’d put up at least something of an update.

Firstly, we’re rid of the trailer. The good free help we were talking about before went AWOL, so the last push was just us (with help from my brother… you’re awesome, man!) There’s still some trash lying around the site that we’ll get to, but nothing that presents a hazard to navigation or sitework.

We also had to cut up the steel frame of the trailer using some torches, which was a lot of fun, even in the 95-degree heat. I’m sorry about some of the weird colors in the pictures, but the camera had a really hard time dealing with the direct sunlight and the super-bright light of the torch.
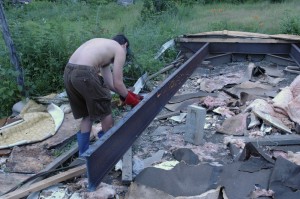
Lighting the torches!

Lighting the torches!

My brother and I started out in shorts and topless. A few minor burns later, we decided to put on some more layers...

My brother and I started out in shorts and topless. A few minor burns later, we decided to put on some more layers…
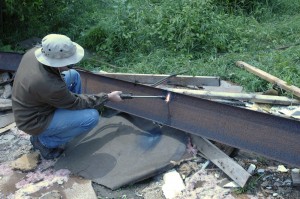
Kind of like this. It was very, very warm. I had sweat literally soaking through the fabric of my jeans.
Kind of like this. It was very, very warm. I had sweat literally soaking through the fabric of my jeans.

This was our high-tech rig for moving the oxygen and acetylene around the job site.

This was our high-tech rig for moving the oxygen and acetylene around the job site.

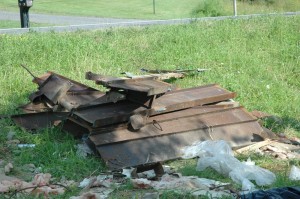
And scrap! We cut to about 6 foot because that's what we needed to fit in the truck. 4 foot pieces bring more at the scrap yard though.

And scrap! We cut to about 6 foot because that’s what we needed to fit in the truck. 4 foot pieces bring more at the scrap yard though.

Torches were very reasonable. We had to put down a deposit of $200 to rent the equipment, and it was about $20 to fill each tank. We had to re-fill the oxygen once, so total was about $60, which was covered by the cost of the scrap with beer money left over.

After that, we picked up trash. I hate fiberglass insulation. It’s itchy.

But our puppy-dog Tuna came over to help!

But our puppy-dog Tuna came over to help!

Also, baby turned 1. We jerry-rigged a ball pit for him:

Happy Baby!

Happy Baby!

Formaldehyde-Free Flooring, Roofing and Walling Part 2

The trailer is still up. This is frustrating. So in the meanwhile, I’ll talk some more about the theory of building a healthy house.

In Part I, I talked about the main sources of formaldehyde outgassing in the home, which are: Furniture, Walls, Floor Joists, Sub-floor, Hardwood Floor and Roof

I explained how we’re avoiding the formaldehyde in furniture and how we don’t have to worry about the walls (because we’re using ICFs). In this post, I’ll try to talk about floor joists and sub-floor, or only the floor joists if the post gets too long.

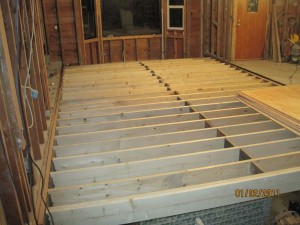
So, floor joists. They’re the things that hold up the floor. On a finished house, you usually don’t see them, but on an unfinished house they look like this:

Picture taken from this website.

Picture taken from this website.

You put subfloor over the top of them and then put carpet, linoleum, tile or hardwood over the subfloor. Except we all know that the only cool choices are tile and hardwood of course. On that picture, the floor joists are simply untreated dimensional lumber (2x10s by the look of them). Until not so long ago, that was pretty much the only choice. It’s also a pretty good choice because untreated lumber doesn’t outgas anything.

The problem is, dimensional lumber doesn’t commonly come in lengths greater than 16 feet. It’s just too hard to find trees that are tall, wide and straight enough. However, the interior span of our house is over 30 feet. Normally, you can work around that by correctly placing load-bearing walls so that no unsupported span is over 16′. However, our living room is 16′ 3.5″. That’s simply impossible to do with dimensional lumber. Oh no! Have we been gypped by our architect?!

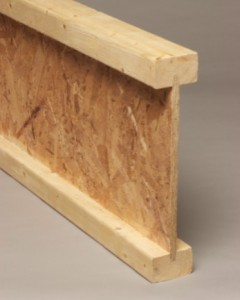
Fortunately, science comes to the rescue with a couple of options. One of them is I-beams, which consist of two pieces of wood attached to the top and bottom of a long piece of plywood:

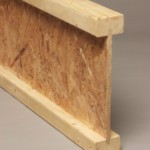
This is a composite wood I-beam. Picture from this website.

This is a composite wood I-beam. Picture from this website.

The advantages are: an I-beam is stiffer than dimensional lumber of the same size. This means the floor is less “springy”. I-beams can also be much wider and longer because they’re not cut out off one piece of wood. Dimensional lumber doesn’t come in a size greater than 12″ wide by 16 foot long; I-beams, however, can be up to 16″ wide or even bigger if you custom-order, and they can be any length you want. A 16″ I-beam doesn’t need any support over a span of 32 feet! An I-beam will also not bend or warp due to age and humidity.

The disadvantages is I-beams use engineered wood and therefore outgas formaldehyde. They’re also more expensive than regular wood.

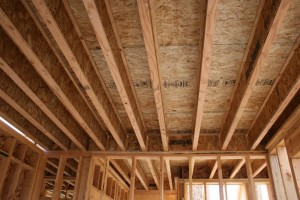
Here’s a picture of I-beam floor joists:

I-beam floor joists. Picture is from this website.

I-beam floor joists. Picture is from this website.

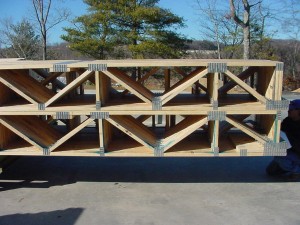
Another option are floor trusses, which are frames made out of 2x4s or 2x3s:

Floor trusses stacked on each other. Picture from this website.

Floor trusses stacked on each other. Picture from this website.

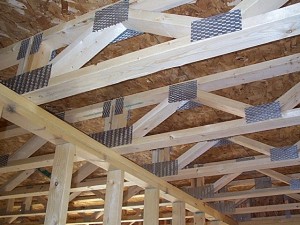
Advantages: no formaldehyde because they use regular untreated lumber. However, they may be coated with a fireproof coating that can outgas substances. That should be looked into. Floor trusses can also be made as long as necessary and strong enough to cover any span. Another advantage is that it’s really easy to run plumbing, ducts and electrical through them because they already have a bunch of openings going through them. For I-beams and regular wood trusses, you have to carefully drill holes through the trusses.

Disadvantages: they’re a little more expensive than I-beams, and much more expensive than regular wood.

Here’s a picture of floor trusses in action:

Floor trusses in action! Picture from here.

Floor trusses in action! Picture from here.

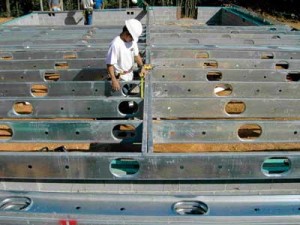
Final option: steel floor joists. They look like this:

Steel joists. Picture from here.

Steel joists. Picture from here.

Advantages: Tough and cheap (the only thing cheaper is dimensional lumber). Fireproof. Doesn’t outgas anything. As you can see in the picture, they have pre-drilled holes for plumbing and electrical.

Disadvantages: Not going to lie on this one – I’m personally a little leery of screwing sub-floor to thin sheet metal (which is what steel floor joists are made of). It doesn’t seem like that would be as strong as attaching the sub-floor to a nice, thick bearing surface. But I may change my mind as I look into this more.

So which of these options are we going with?

I’m leaning towards the floor trusses for the advantages that I listed. The cost is really not that much higher than I-beams and they don’t outgas formaldehyde. However, in the big scheme of things, I-beams don’t outgas all that much formaldehyde compared to all the other stuff that we mentioned: there’s only a few of them, they don’t contain that much plywood and furthermore they’re encased in the floor. Steel joists are being perhaps unfairly side-lined for the disadvantage that I listed above…

Oh, another advantage of I-beams and steel joists is that they’re available instantly! Floor trusses have to be built to your exact specifications and it usually takes a few weeks (I’ve been told 2-3 weeks). So keep that in mind!

Anyway, enough stuff about building. Here’s a picture of baby:

The child and I are not amused by how long it's taking to bring down this trailer. Can you tell how not amused we are?

The child and I are not amused by how long it’s taking to bring down this trailer. Can you tell how not amused we are?

Formaldehyde-Free Flooring (and Roofing and Walling) Part I

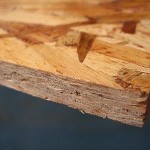
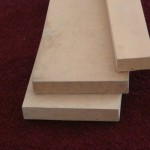
This is OSB/Chipboard. Picture stolen from Wikipedia.

This is OSB/Chipboard. Picture from Wikipedia.

This is MDF. Picture from Wikipedia.

This is MDF. Picture from Wikipedia.

As you know if you’ve been following the blog, we’re committed to building a healthy house. Guess what gas makes up most indoor air pollution? (Hint: it’s right in the title of the post…) Yup, it’s formaldehyde. Formaldehyde is a component of glues used in making most types of engineered wood products: plywood, OSB (aka chipboard), MDF, particleboard, etc. Formaldehyde is used because it’s cheap and strong. Unfortunately, it’s also toxic in large quantities and can cause cancer in small quantities. More importantly, various types of engineered wood can outgas formaldehyde for years and years after they’re made.

Also unfortunately, engineered wood is everywhere! Major sources of formaldehyde indoors are:

  1. Furniture. Pretty much all furniture nowadays uses particleboard, and particleboard leaches formaldehyde. Of course, Megan and I haven’t gotten around to furnishing our house yet, but when we do we’re going to try and use as much solid-wood furniture as possible. Some of it we’re going to make ourselves, some of it will be re-vamped antiques and some of it we’ll buy new. Believe it or not, there are a couple of companies out there that make ready-to-assemble furniture out of solid wood, and they’re not even that much more expensive than the particleboard stuff.
  2. This is a composite wood I-beam. Picture from this website.

    This is a composite wood I-beam. Picture from this website.

    Walls. Specifically, the sheathing, which is the layer around the outside of the house to which the siding is attached. Fortunately we’re building with ICFs, which means we’re not using sheathing, so this is not a problem! (By the way: the expanded polystyrene — EPS — used to make ICFs also outgasses. But it outgasses pentane, which is nowhere near as toxic as formaldehyde and has no long-term health effects.)

  3. Floor Joists. Traditionally, floor joists were just great long boards of untreated timber that came straight from the lumber mill and didn’t outgas anything. Nowadays, wooden I-beams have become very popular. Their advantage is that they can bridge larger spans without needing extra support (such as our wide-open dining room/living room area). The disadvantage is that they use engineered wood, which means formaldehyde-based glue.
  4. Sub-floor. In older houses (such as the one we’re living in now), these were just regular untreated boards nailed down over the floor joists. Nowadays, plywood is used because it’s cheaper, flatter and changes less due to swelling, drying and warping. Plywood releases formaldehyde.

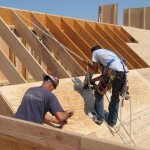
    Workers putting down roof sheathing. Tarpaper and shingles go over this. Picture from this website.

    Workers putting down roof sheathing. Picture from this website.

  5. Hardwood Floor. We want to have hardwood floors throughout most of our house. The traditional way to do this is to nail down regular hardwood boards and then finish them with some kind of sealant. But you can also get engineered floor, which has the advantages of being less work to install, easier to soundproof and doesn’t have to be sealed (most sealants outgas as they cure), which are all important things for us. The drawback? Most engineered floors use plywood bases.
  6. Roof. Roof sheathing, which is the outer layer of the roof to which you attach the shingles, is usually some kind of engineered wood.

So what are we doing to deal with these sources of formaldehyde? Several things! But I’m leaving that for another post, because this one is getting long.

And now, we interrupt our broadcast to bring you pictures of a beautiful baby:

"This shovel doesn't contain formaldehyde, does it?" "No son, it probably contains BPA instead..."

“This shovel doesn’t contain formaldehyde, does it, Dad?” “No son, it probably contains BPA instead…”

How to Get a Trailer Taken Down for Free and Other News…

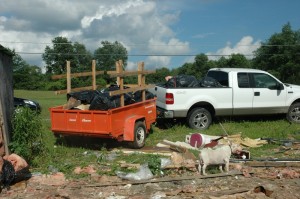
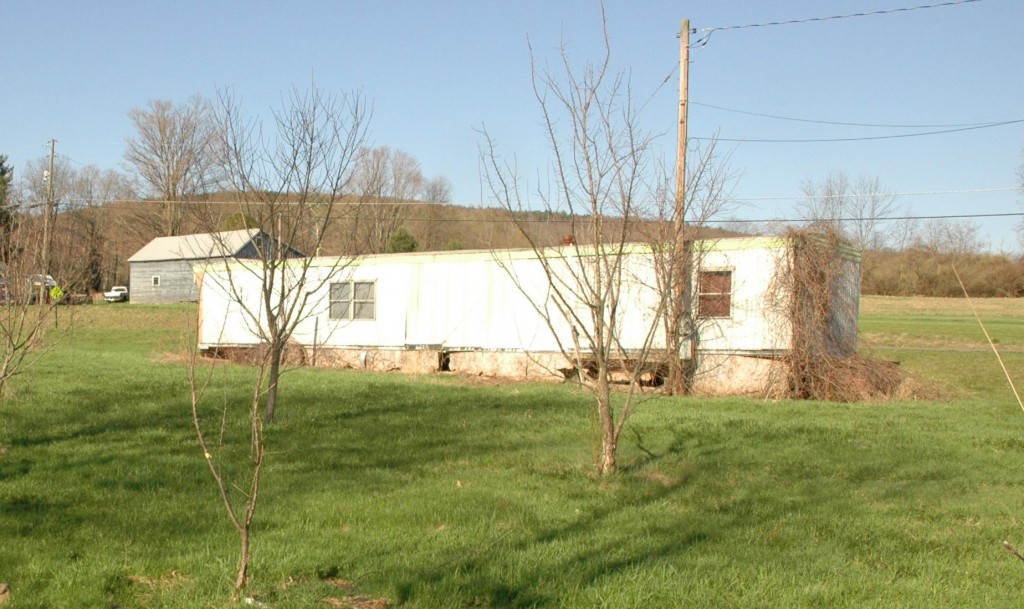
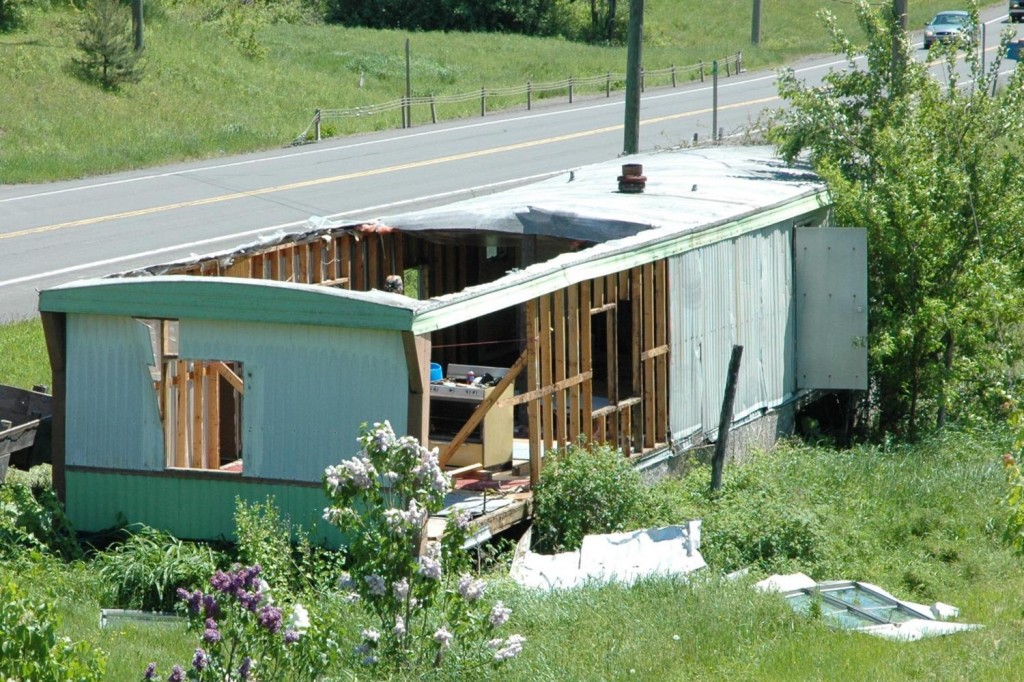
So if you recall from our earlier posts, this thing is sitting on our land, and needs to go:

Sorry that the photo is a little blurry.

Sorry that the photo is a little blurry.

Now, it’s not the prettiest (inside or out), but the walls and roof are sound, and it’s a “trailer”, right? So my first thought was that maybe someone could use it to live in and I put up an ad on Craigslist offering it for free to anyone who can get it out of there. And I got some interest. A few people came out to look at it. Unfortunately, transporting a mobile home is pretty expensive unless you already own the equipment: thousands of dollars, depending on mileage. So ultimately, that got no takers.

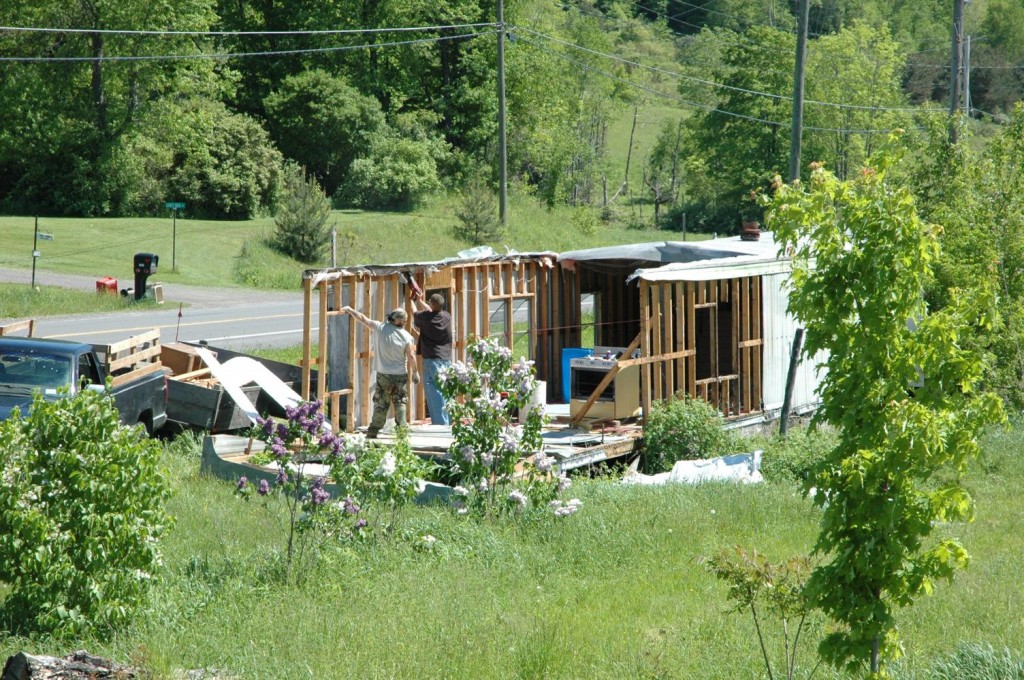
At the same time, I got several offers from people who wanted to pull it down for scrap. So after giving it a week or so, I called up the first person who e-mailed me about that… they also promised to clean up and not leave a mess, which was the main reason I picked them. They got to work pretty soon. These pictures are from day 2:

Trailer Tear-Down Day 2

DSC_0750_small

We’ve had some heavy thunderstorms for the past few days, so the work has been on hold, but the trailer should be torn down with plenty of time to spare.

By the way, to get this thing torn down by a professional demolition crew is around $3,000 – $3,500, and you need to get a demolition permit. I know because I asked one of the guys who was giving me a quote for excavation and septic. So I think everyone got a pretty good deal.

In Other News:

  • The building permit application was submitted on Friday, May 24.
  • I have another ICF block to consider, which is Fox Blocks, mostly because of their “Fox Buck”, which is a neat and elegant way to make door and window bucks. (When I first heard the term “window buck”, it sounded vaguely unstable and dangerous. Like a bronco or something. But actually, it’s the frame that forms the window opening to which you attach the actual window when you install it. And ideally, there is no danger involved.) Anyway, bucks are kind of a weak point in the ICF construction process, at least so far, though a few companies are coming up with better ways to do them. I’ll be writing in more detail on the subject at some point.

Tornado-Proof Housing and Quick News Update

Grace and I didn’t talk about this when we discussed why we picked ICFs, since it’s not really a concern in our area, but after the horrible events in Oklahoma over the past couple of days, I thought I should mention it. ICF construction is “tornado-proof”, or at least tornado resistant. Six inches of concrete reinforced with rebar are pretty tough, and if you build the roof correctly, you would be in pretty good shape. Some ICF manufacturers claim that ICF buildings can withstand up to 200 mph winds. This might not help if the tornado barrels right through your home, but it could be the difference between life and death if you’re a little further away. The same applies if you live in a hurricane-prone area (and since Hurricane Sandy came through southern NY last year, only a few hours away from us, I’m not sure I can really say that our area is “hurricane-safe”).

Hopefully this technology becomes more popular in the tornado belt. I know that a lot of people already use ICFs to add tornado shelters to existing homes (something like this). As Grace and I hope to prove, ICF construction is not more expensive than stick homes, and I think it can really make a difference when Mother Nature is unhappy.


Quick News Update:
So I’m sure you’ve noticed it’s been quiet for a couple of days. We’re in the process of applying for a building permit (I’m dropping the paperwork off tomorrow). We’ve also been getting quotes for site work — excavation for the foundation, driveway, that sort of stuff — and doing some more research on ICF blocks, since it’s around that time where we need to settle on a brand. The short list so far seems to be (in alphabetical order): Amvic, BuildBlock, IntegraSpec, Logix and RewardWall. These products are broadly similar. They’re generally considered pretty good. Each has its little pros (which the manufacturers’ websites will be more than happy to tell you about in great detail). I’m sure there are little cons as well. Three of them are Canadian. Two are US-based. All of them can (theoretically) be used to do what we want to do. So we’ve some reading to do and some choices to make. We’ll keep you posted!


Meanwhile, here’s a picture of the baby looking cute and fat:

Cute fat baby!

Cute fat baby! Look at the little toes!

House Plans! (and what we’re doing next)

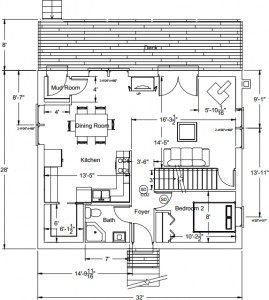
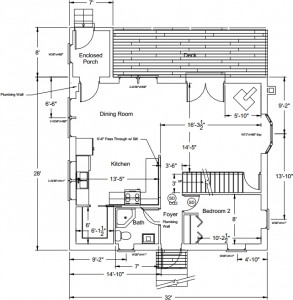
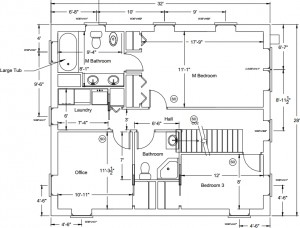
The architect took a few days working on a plan based on our sketch while we waited in anticipation. Finally we received the long awaited e-mail. This was attached:

House plans, v.2: first floor

House plans, v.2: first floor

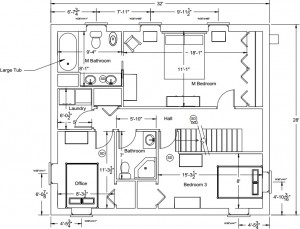
House plans, v.2: second floor

House plans, v.2: second floor

Looks much better! Even if I do say so myself. Grace and I walked around for about a day going like: “Aren’t we a pair of brilliant house designers?”

Naturally, a few tweaks were necessary here and there. I’ll skip the next 3-4 versions of the plans, because they’re essentially identical. (After receiving each new update, we would admire the plans, turn to each other and say: “Aren’t we a pair of brilliant house designers?”) Here’s the final version:

House plans, final version: first floor

House plans, final version: first floor

House plans, final version: second floor

House plans, final version: second floor

So now, next things:
1. Call up the county clerk and find out what it takes to get a building permit now that we have the house plans and the septic plans.
2. Start getting quotes for materials and those things that we’re sub-contracting out (such as excavation) or partially sub-contracting out (such as the footing).

Previously, I mentioned that we needed to get quotes for well-drilling and septic, but as I found out, those things go in after the walls and roof are up (because you don’t want construction machinery driving over a septic tank or a well head; it’s not good for it), so I’ve put that off for now.

Onwards and upwards!

May 1 News Update! (baby picture inside)

Firstly, I want to apologize on behalf of Grace and myself that we haven’t gotten to the interesting part yet (you know, the actual construction). Better people than us, I’m sure, would’ve already laid the cornerstone by this point. But we are not that efficient.

News of the Past Few Days:

First, we’ve come up with an architect who is experienced at working with ICFs and thrown a list of requirements at him. He’s going to convert these into a sketch. We’re going to critique the sketch. He’s going to produce another one and so on until both sides are happy. (Well, until we’re happy, anyway. Hopefully, he will be happy as well.)

This is literally all the proof I have that the septic engineer wasn't a figment of my imagination.

This is literally all the proof I have that the septic engineer wasn’t a figment of my imagination.

Second, we’ve talked to a septic engineer. If there are any high school age kids out there reading this, this is a great career path: he came out here, dug a hole, poured water in it, wrote something on a piece of paper, collected $600 and drove away. That was Monday. This morning, we got a big envelope in the mail with a bunch of maps and stuff. Good news: he pretty much drew it the way we were envisioning it in the last post. In case anyone needs a septic engineer in Central NY (Madison/Chenango counties), here’s his contact information:

Wayne Matteson
Phone: 315-662-7146
Cell: 607-423-4321
E-mail: wmatteson at frontiernet dot net

Third, in exploring the whole field of ICF construction, I came across the Green Building Talk forums. Talk about a wealth of information. Lots of knowledgeable people on there and the archives are full of good stuff. I felt a little intimidated asking about our 25’x30′ foot cottage when other people were discussing the construction of malls and health clinics. But I didn’t lose any limbs and even gained some enlightenment.

Our dog Shark. Darryl's dog is the same breed (Great Pyrenees)

Our dog Shark. Darryl the Contractor’s dog is the same breed (Great Pyrenees)

One of the folks on there ended up e-mailing me after he saw that I was located in New York State. His name is Darryl Thomas and he is an ICF contractor and ICF block distributor covering most of upstate New York. We ended up chatting on the phone and he sounds like a pretty awesome guy. Definitely someone who knows what he’s doing (at least, I couldn’t come up with a question to stump him) and very open to the whole idea of working with self-builders like us. Grace and I are strongly considering having an experienced contractor help us for some of the crucial steps in the process and he’s on the short list just based on that conversation.

We discussed the possibility of my shadowing him at a job site just to see how things are done and he said he would let me know if/when he had any builds in our area. (When Darryl says he covers most of New York, he’s not kidding: he currently has builds going on in Niagara, Port Jervis and Keesville out on the Canadian border.) His number, in case you’re looking for an ICF contractor / consultant and he sounds like a fit, is 518-312-0486.

Oh, he also owns a big white dog just like ours.

That’s about it for news. And now, baby picture. This one was the work of famed photography duo Matt & Grace and is entitled “We Waited Too Long”:

"We Waited Too Long"

“We Waited Too Long”

Inventory and Things To Do

I wanted to quickly summarize where we are in the home-building process. But first, a random picture of our beautiful child:

Get a load of those cheeks!

Get a load of those cheeks!

What we have so far:

  • One (1) parcel of land, approximately 3/4 of an acre in size
  • One (1) burning desire to build a house
  • One (1) bank account with not enough money in it
  • Some tools and stuff

Things that we need to do next:

  • Find an architect. Not only is this required for getting a building permit, but we’re also building with ICFs, which means that the walls of the house will be literally cast in concrete once they’re finished. Also, have you ever tried to sketch house plans? We have, and it’s pretty fun until you realize that your stairs run straight into a blank wall, the master bathroom has windows facing out into the hallway and one of the bedrooms is not actually accessible from anywhere else in the building. (Not kidding, this is what actually happened.)
  • Find a septic engineer. This is also required for a building permit. The calculations themselves aren’t actually all that difficult. Our land is in a pretty rural area, so we have no option for city sewer, city water or other nice things like that.
  • Talk to well-drilling people, to get quotes.

Local friends: do you have anyone you could recommend for us?

The First Post

Yay! We have a blog!

So first thing, Disclaimer: Although the heading of the blog is “how one family built their dream home”, at this point it’s actually more about “how one family decided to build something that might someday become their dream home… it might actually be more of a nightmare… we don’t know… stay tuned”. But as you can see, that would be far too long for the heading, so I decided to bend the truth a little.

My wife, I and our 9-month-old baby are going to build a house. We’re going to build this house with insulated concrete forms (ICFs) because those things are awesome, energy efficient, green and sustainable. We’re going to do most of the work ourselves because we’re trying to save money and because it’ll be fun. And we’re going to blog about it, because that seems to help keep things organized.